使用 Cloudflare 的 Tunnel 穿透内网,架设家庭服务器
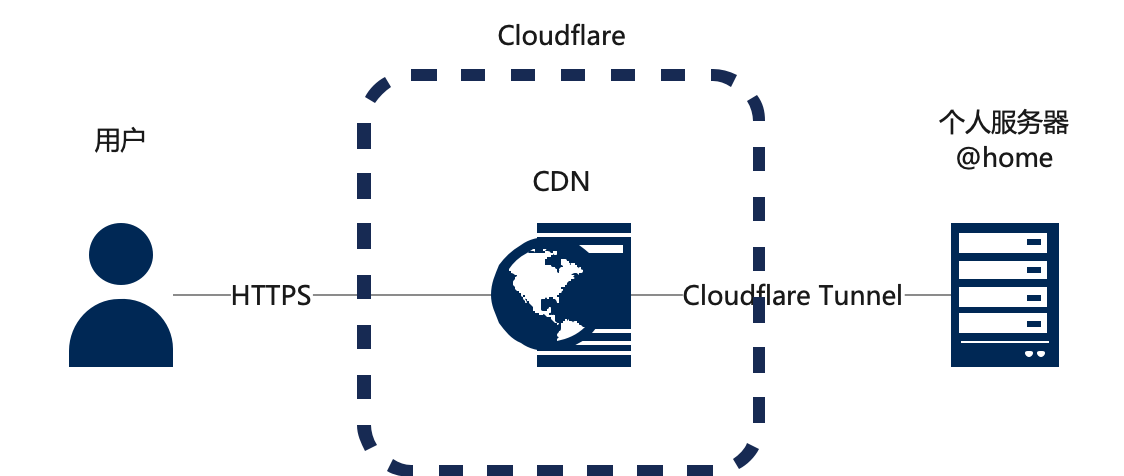
Cloudflare Tunnel 是 Cloudflare Zero Trust网络的一个产品,通过 Cloudflare Tunnel,可以实现云与设备之间打通一条加密通道,通过这条加密通道访问到部署在内网的服务。
整套内网穿透的方案大致如下:
下面我们来具体部署
1. 部署前的前置条件
- 首先你要有一个Cloudflare的账号,且已经添加了相应的域名,同时开通了Cloudflare Zero Trust。
- 本地一台Web服务器,Linux、Windows Server 都可以,只要能正常提供 Web 服务。我的服务器使用的是 FreeBSD 14.1
2. 安装 Cloudflared
- Cloudflared 是 Cloudflare Tunnel 的一个本地 cli 客户端,可以实现管理功能和守护程序。
- 根据不同服务器的操作系统下载相应的安装包
- 在我的 FreeBSD 上安装方式如下:
1
2
3
4
5
6
7
8
9
10
11
12
13
14
15
16
17
18
19
20
21
22
23
root@freebsd:~ # pkg search ^cloudflare
cloudflared-2023.10.0_2 Cloudflare's Argo Tunnel client
root@freebsd:~ # pkg install cloudflared
Updating FreeBSD repository catalogue...
FreeBSD repository is up to date.
All repositories are up to date.
The following 1 package(s) will be affected (of 0 checked):
New packages to be INSTALLED:
cloudflared: 2023.10.0_2
Number of packages to be installed: 1
The process will require 29 MiB more space.
7 MiB to be downloaded.
Proceed with this action? [y/N]: y
[1/1] Fetching cloudflared-2023.10.0_2.pkg: 100% 7 MiB 7.3MB/s 00:01
Checking integrity... done (0 conflicting)
[1/1] Installing cloudflared-2023.10.0_2...
[1/1] Extracting cloudflared-2023.10.0_2: 100%
3. 登录 Cloudflared
使用之前,我们需要登录。输入命令后,终端会给出一个登陆地址,拷贝到浏览器里面打开,选择需要授权的网站。
1
2
3
4
5
6
7
8
9
root@freebsd:~ # cloudflared tunnel login
Please open the following URL and log in with your Cloudflare account:
https://dash.cloudflare.com/argotunnel?aud=&callback=https%3A%2F%2Flogin.cloudflareaccess.org%2Fwrgq......
Leave cloudflared running to download the cert automatically.
You have successfully logged in.
If you wish to copy your credentials to a server, they have been saved to:
/root/.cloudflared/cert.pem
4. 创建 Tunnel
授权完以后,我们需要创建 Tunnel ,创建完以后,会输出 Tunnel 的一个 UUID。
1
2
3
4
root@freebsd:~ # cloudflared tunnel create <tunnel name>
Tunnel credentials written to /root/.cloudflared/12345678-abcd-1234-efgh-a1b2c3d4e5f6.json. cloudflared chose this file based on where your origin certificate was found. Keep this file secret. To revoke these credentials, delete the tunnel.
Created tunnel <tunnel name> with id 12345678-abcd-1234-efgh-a1b2c3d4e5f6
5. 域名指向
接着,我们需要把域名指向刚创建的 Tunnel
1
2
root@freebsd:~ # cloudflared tunnel route dns <tunnel name> <domain name>
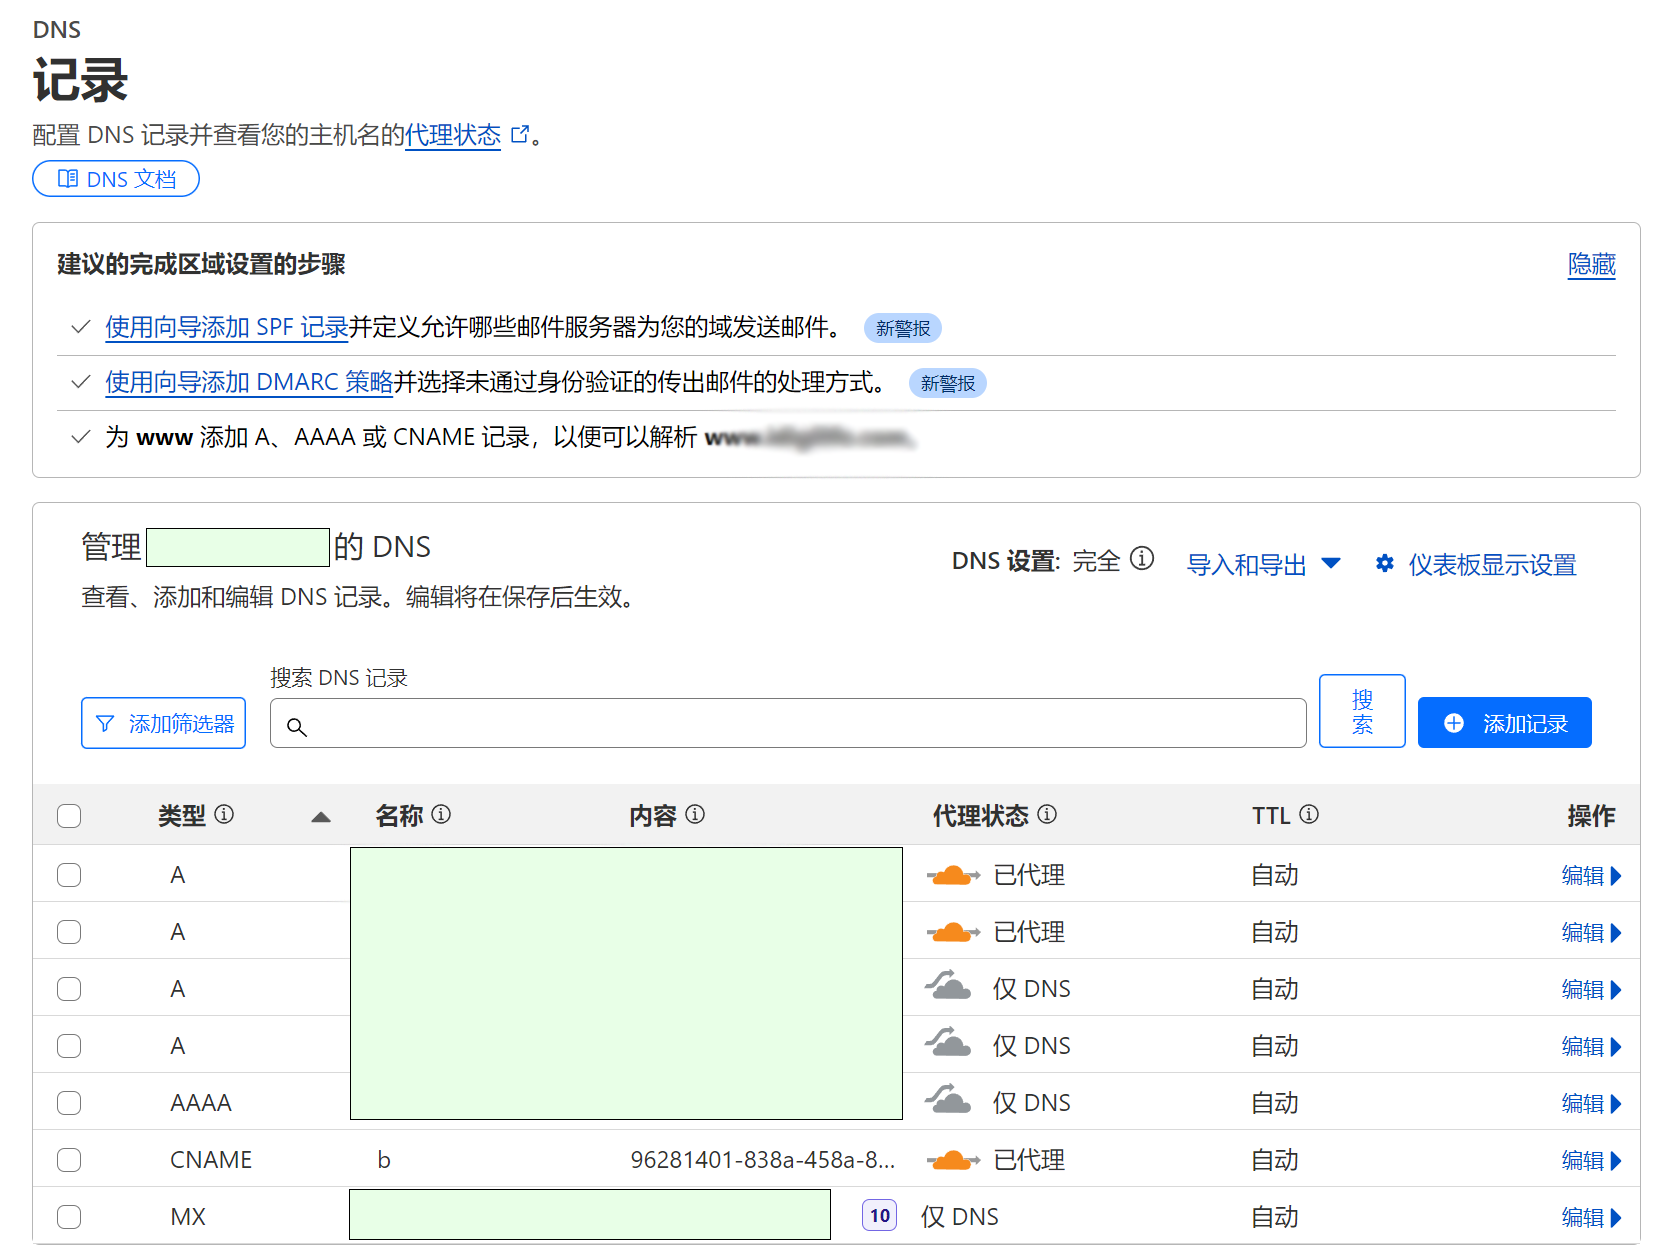
2024-10-04T02:25:19Z INF Added CNAME <domain name> which will route to this tunnel tunnelID=12345678-abcd-1234-efgh-a1b2c3d4e5f6
这时候,Cloudflare 会自动添加一条 CNAME 记录到对应的域名,如下图所示:

6. 配置 Cloudflared
- 编辑配置文件
1
2
3
4
5
6
7
8
9
10
11
12
13
14
15
root@freebsd:~ # vim .cloudflared/config.yml
tunnel: 12345678-abcd-1234-efgh-a1b2c3d4e5f6 # 修改成你刚才创建的 tunnel uuid
credentials-file: /root/.cloudflared/12345678-abcd-1234-efgh-a1b2c3d4e5f6.json # 修改成你刚才创建的 tunnel uuid
protocol: h2mux
ingress:
# 第一个网站,连接到本地的80端口
- hostname: <domain name> # 修改成你刚才指向 tunnel 的域名
service: http://localhost:80
# 第二个网站,https协议,连接到本地的443端口,禁用证书校验(用于自签名SSL证书)
- hostname: <domain name> # 修改成你刚才指向 tunnel 的域名
service: https://127.0.0.1:443
originRequest:
noTLSVerify: true
originServerName: <domain name> # 修改成你刚才指向 tunnel 的域名
- service: http_status:404 - 更多支持的配置方式,可以参考帮助文档
- 测试配置文件及规则命中
1
2
3
4
5
6
7
8
root@freebsd:~ # cloudflared tunnel ingress validate
Validating rules from /root/.cloudflared/config.yml
OK
root@freebsd:~ # cloudflared tunnel ingress rule https://<domain name>
Using rules from /root/.cloudflared/config.yml
Matched rule #0
hostname: <domain name>
service: http://localhost:80
7. 启动服务
- 修改 /etc/rc.conf,添加以下配置
1
2
3
4
5
root@freebsd:~ # vim /etc/rc.conf
# cloudflared
cloudflared_enable="YES"
cloudflared_conf="/root/.cloudflared/config.yml"
cloudflared_mode="tunnel run" - 启动服务
1
2
root@freebsd:~ # service cloudflared start
Starting cloudflared.